|
Size: 729
Comment:
|
Size: 891
Comment:
|
| Deletions are marked like this. | Additions are marked like this. |
| Line 6: | Line 6: |
| === Center room === | |
| Line 7: | Line 8: |
| . [[attachment:EndRoom_100806.png]] | . Layout planning / Space occupation (request to Uchiyama) . [[attachment:Laser_Room_100813.pdf|laser group]] . [[attachment:layout100812.pdf|vacuum group]] . [[]] === End rooms === . [[attachment:EndRoom_100806.png]] === Tunnel === |
| Line 9: | Line 19: |
| . [[attachment:Tunnel_Ry_100818.pdf]] | |
| Line 10: | Line 21: |
| . Layout planning / Space occupation (request to Uchiyama) . [[attachment:Laser_Room_100813.pdf|laser group]] |
Infrastructure
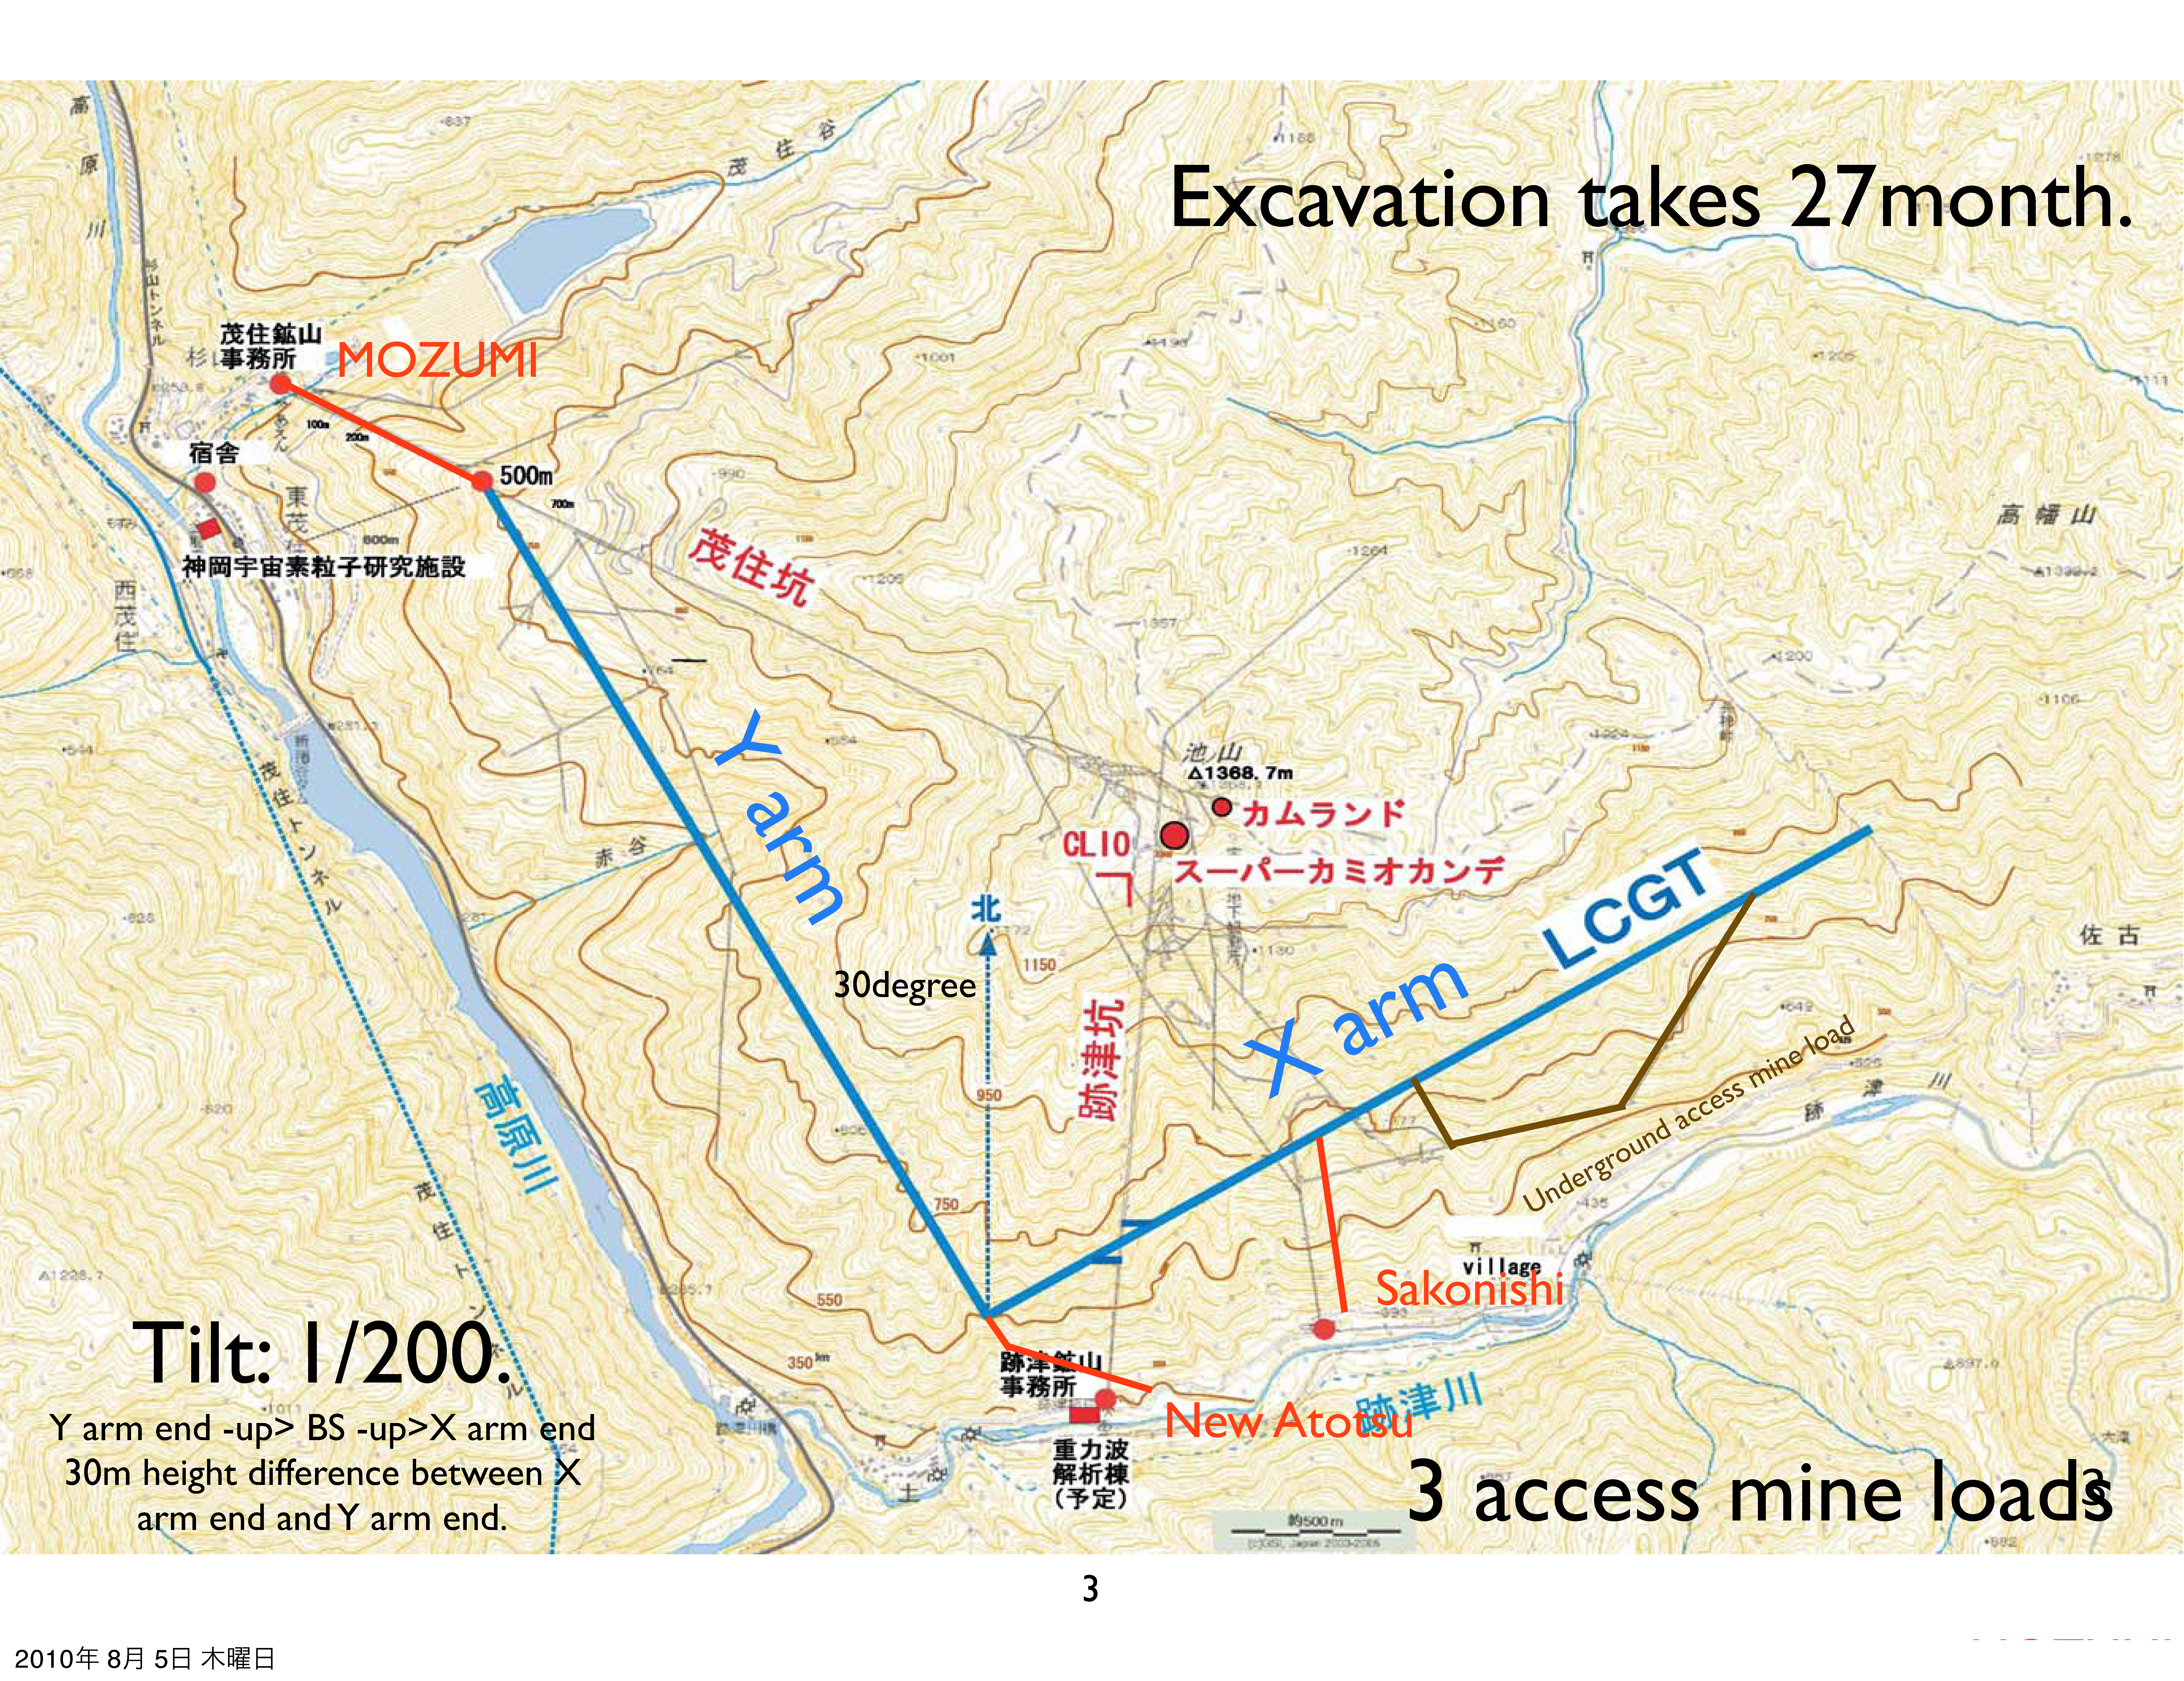
Overview of the underground labyrinth
Detailed view of each experimental hall
- === Center room ===
- Layout planning / Space occupation (request to Uchiyama)
- [[]]
EndRoom_100806.png === Tunnel ===
Life lines
- Water for cooling
- Network
- TCP/IP network
- For Digital Control
- GPS and timing system
- Telehone (IP phone??)
Security & Administration
Cleanliness
- Air intake from out-of-mine

